

A well-prepared room helps participants feel comfortable, safe, focused, and ready to learn, practice, or move. Room setup shapes class energy before anyone says a word.
Seating, lighting, equipment placement, and open space can either support participation or make people feel boxed in.
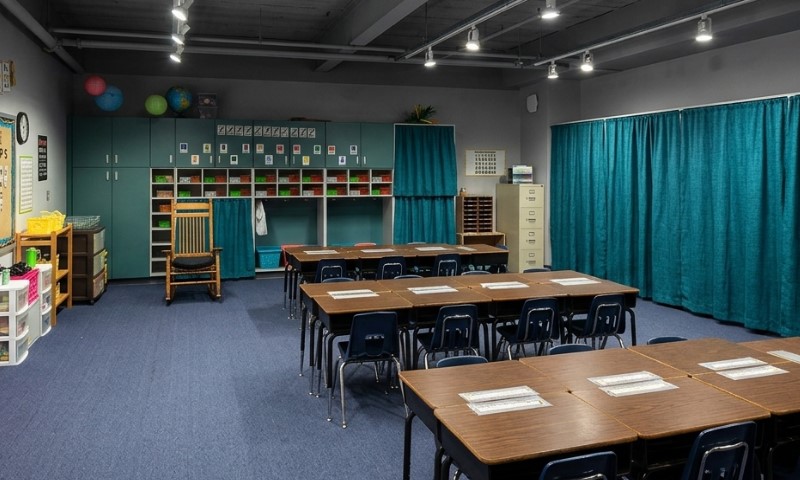
Row-style seating can make a session feel formal and less interactive.
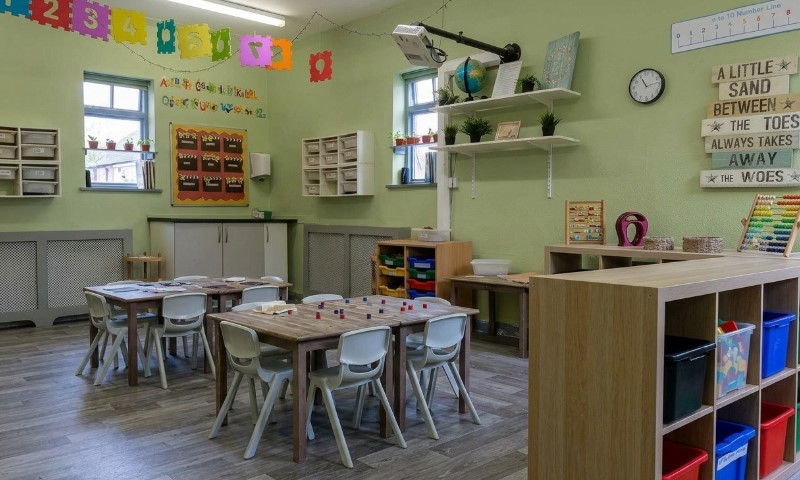
Small table groups, open layouts, or semi-circle seating can make it easier for participants to talk, ask questions, move, and stay engaged.
Arriving early and checking every part of the space helps protect class time and creates a smooth start.
Choose the Right Room Layout
Match the room layout to the class format. Interactive training works best when participants can see one another, talk easily, and move without feeling crowded.
Straight classroom-style rows may work for lecture-based sessions, but they can limit discussion and make class time feel less active.
Use round tables or rectangular tables pushed together into small pods when group work is part of the session.
Small group seating supports discussion and makes it easier for the instructor to check in during activities.
Helpful group seating details include:
- Groups of about 3 to 6 people
- Tables close enough for conversation
- Clear space around each pod for instructor access
- Seating that lets participants see the instructor and each other
A semi-circle layout can work well for a less formal and more interactive session.
Participants can see the instructor, view demonstrations, and still feel connected.
Open space in the center can also support movement, discussion, or hands-on practice.
Leave enough space for demonstrations, station rotations, movement activities, and instructor access.
Clear walking paths help the instructor reach participants quickly and safely. Open areas are especially important for fitness classes, skills practice, and sessions using equipment.
Arrange seating so everyone can see key teaching areas clearly.
- Instructor area
- Screen
- Board
- Flip chart
- Demonstration area
Avoid placing participants so they face large daytime windows. Bright windows can make the instructor, board, or flip chart appear backlit and hard to see.
Prepare Equipment and Materials
Set up chairs, tables, mats, workout stations, and training materials before participants arrive. Every item should have a clear place and purpose.
A prepared room helps participants enter calmly and gives the instructor time to greet people instead of solving setup problems.
Make sure there are enough chairs for the expected number of participants.
Lack of chairs is a common setup mistake, but it is easy to prevent with an early count and a few extra seats nearby.
Chairs should be placed neatly with enough room for people to sit, stand, and move.
Test all technology before class starts. Check each item needed for instruction or movement.
- Projector
- Screen
- Laptop connection
- Audio
- Music
- Microphone
- Remote
- Internet access
- Power outlets
For fitness sessions using intervals, circuits, EMOM blocks, or timed rounds, test the Tabata Timer before participants arrive so work periods, rest periods, sound cues, and round counts are ready.
Know where power sockets are located, especially when a laptop, projector, speakers, or background music will be used.
Place cords safely so they do not block walking paths or create tripping hazards.
Place handouts, markers, name tags, sign-in sheets, waivers, and class materials where participants or the instructor can reach them easily.
Materials should not block walkways or create clutter. A simple supply area can keep the room organized throughout the session.
Use large, clear writing on flip charts or boards.
Darker marker colors are easier to read across a room. Light colors, tiny writing, or crowded pages can make it hard for participants to follow along.
Check Comfort and Safety
@lisaelaine_ Classroom set up day 1! Successful and productive! 🙌 All the paper resources you see are in my TPT 💚 most of the “things” are linked in my Amazon storefront! #classroomsetup #classroom #classroomdecor #backtoschool #teacherlife #teachers #teacherhacks #kindergarten #phonics #readingteacher #teaching #teachingresources #kindergartenlife #earlychildhoodeducation #earlylearning #homeschool #momoflittles #schooltime
Adjust lighting, blinds, temperature, and ventilation before class begins.
A room that is too hot or too cold can distract participants, make them sleepy, irritate them, or reduce their ability to focus.
Know how to manage heating or cooling before the session starts.
Control glare, outside noise, and visual distractions as much as possible. Common distractions should be handled early.
- Bright sunlight
- Glare on screens or boards
- Trains
- People walking by
- Outside conversations
- Open windows
- Busy hallways
Close windows, adjust blinds, or change seating when outside activity may pull attention away. A calm room helps participants listen, think, and stay involved.
Remove clutter before class.
Trash, used cups, food wrappers, extra chairs, loose cords, bags, and unused equipment can make a space look careless and create tripping hazards.
Clean walkways make movement safer and make the room feel more professional.
Keep aisles, entrances, and emergency exits clear at all times. Participants should be able to enter, leave, and move around without stepping over equipment or squeezing through tight spaces.
Set Up the Welcome Area
Prepare a check-in spot near the entrance. Participants should know where to go as soon as they arrive.
A clear welcome area reduces confusion and helps class begin in an organized way.
Have required arrival materials ready before participants enter.
- Sign-in sheets
- Name tags
- Waivers
- Handouts
- Class materials
- Pens
Place supplies nearby so check-in moves quickly. Keep the area simple so people can enter, complete required steps, and move into the room smoothly.
Post signs or directions so participants can find the room easily. Send room directions 1 to 2 days before training and place clear signs at decision points leading to the room.
Good directions reduce late arrivals and help participants feel prepared before they arrive.
Be ready to greet early arrivals and answer questions. A friendly greeting can lower nervousness and set a positive tone.
Early arrival time also gives participants a chance to look around, choose a seat, review materials, or ask about expectations.
Final Walkthrough
Complete one final walkthrough before class starts.
Look at the room as a participant would. Check visibility, movement space, comfort, safety, and access.
Confirm that the layout matches the session plan. Chairs, tables, mats, workout stations, and demonstration areas should be set and ready.
Participants should be able to see the instructor, screen, board, flip chart, or demonstration area.